
Believe it or not, the best Bisquick sausage balls don’t need much time or many ingredients to make. And if you use ready-made Bisquick baking mix, the recipe will be even more simple. Preparing them for your meals or parties will be an excellent investment.
In terms of uses, these small snacks are extremely versatile. Whether you want to serve them for breakfast, family dinner, or a quick bite for brunch, Bisquick sausage balls can fulfill the role admirably. Watch out for them as they will surely disappear from the plate very fast!

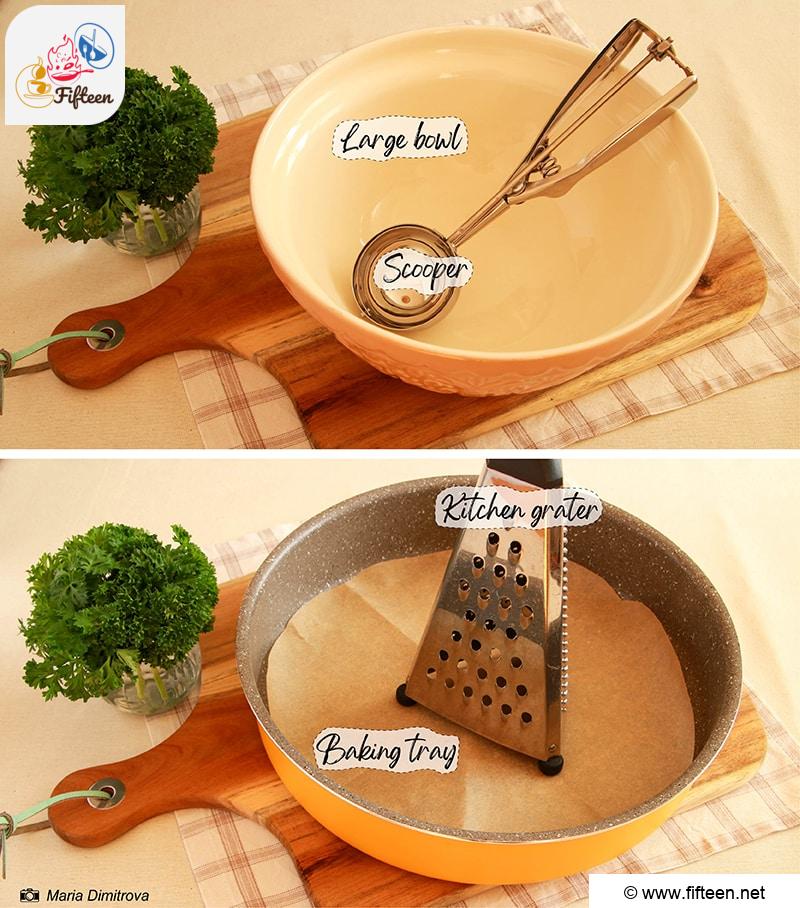
What Are Cooking Tools for Bisquick Sausage Balls?
One of the best things about Bisquick sausage balls is that you don’t need any complicated equipment. A few simple kitchen gadgets are all it takes to get the ball(s) rolling.
Which Are Bisquick Sausage Balls’ Ingredients?
Besides tools, you also need the following components to prepare Bisquick sausage balls:
Steps for Cooking Bisquick Sausage Balls
It’s time for the fun part. Preparing Bisquick sausage balls is so easy with the below 4 steps, and enjoy your full-flavored small bites in no time!
Step 1: Prepare The Bisquick Baking Mix (Optional)
In a large bowl, mix well the flour, baking powder, sugar, and salt. Add the cold butter cubes and rub them with the flour mixture with your hands until you get crumbs.
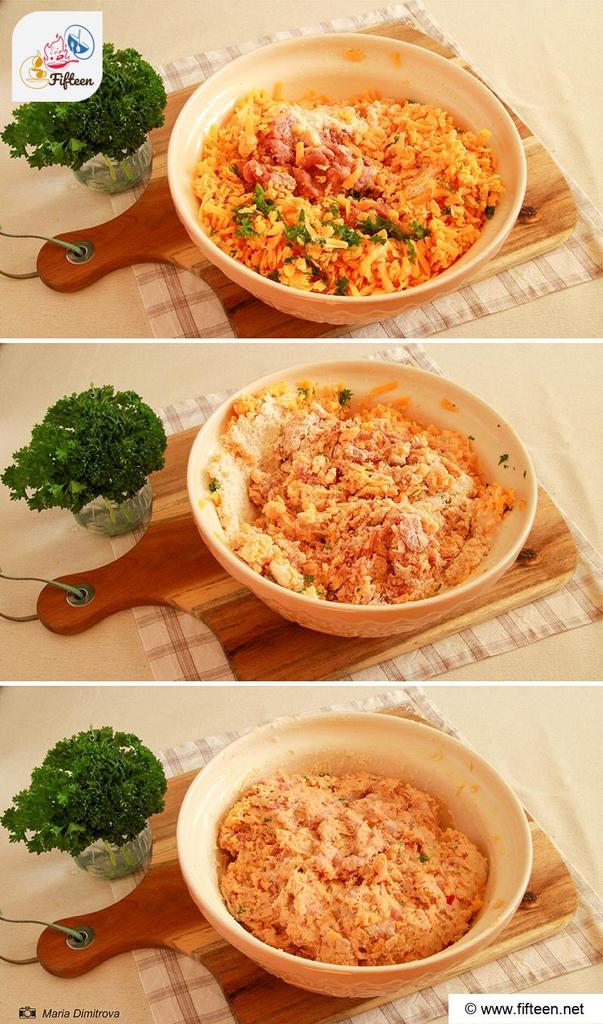
Step 2: Form The Dough
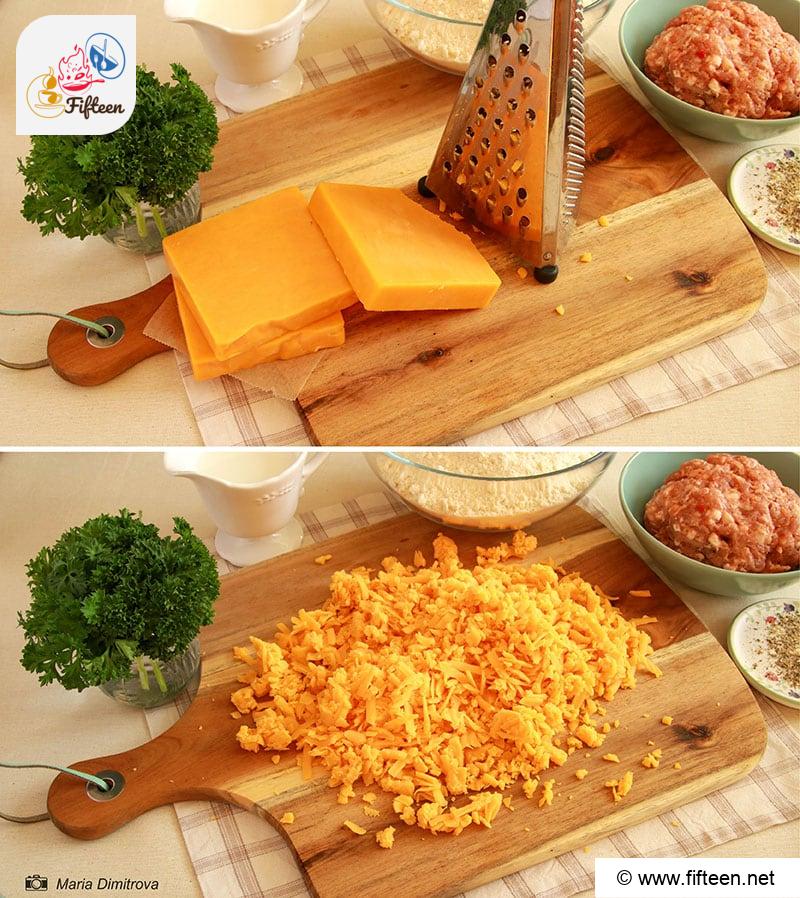
Use the kitchen grater to grate cheddar cheese on the wooden board.
In a large bowl, blend:
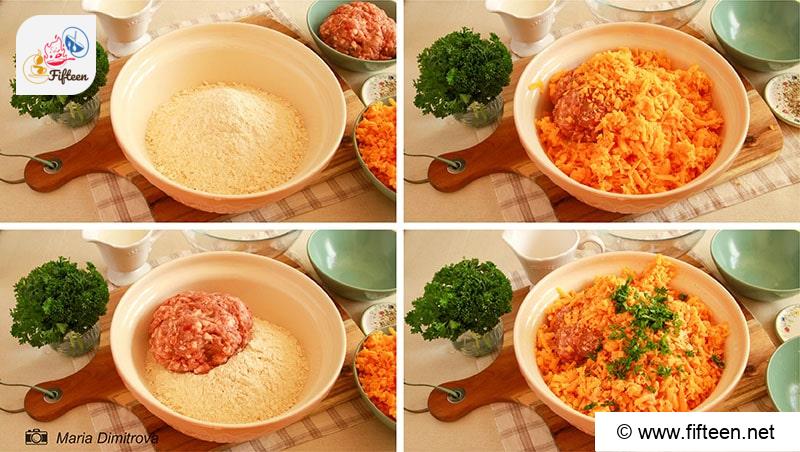
Mix all the ingredients in the bowl well until you get a firm and moist dough. If you have a stand mixer, use it to work the dough even more thoroughly.

Step 3: Shape The Sausage Balls
Line the baking tray with baking paper. Prepare the oven to moderate heat (350°F).
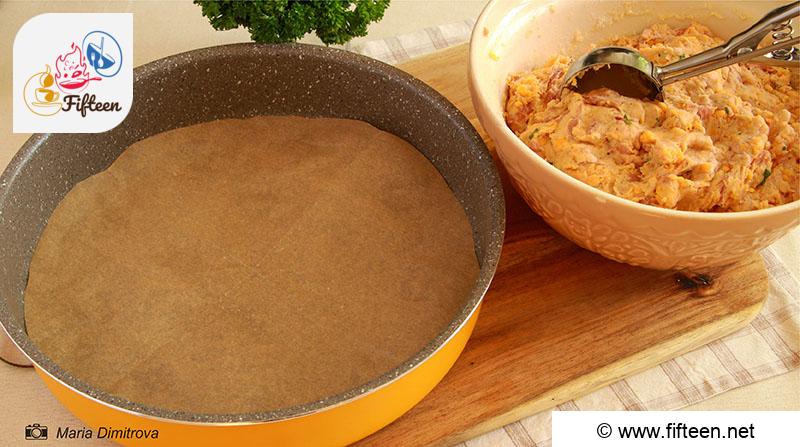
Scoop a small portion out of the dough and shape it into a ball until the dough runs out. Make it as big as you want, but make sure that all the balls are the same size. Mine are about 1 ½ inches in width.
Step 4: Bake The Sausage Balls
Bake the sausage balls for about 20 – 25 minutes or until golden brown. Then, get them out and leave them at room temperature for 10 minutes.
Sprinkle the balls with fresh parsley and oregano. Serve them with your choice of sauce.

How To Serve And Store Bisquick Sausage Balls
These juicy Bisquick sausage balls go great with a variety of sauces, such as mayo sauce, garlic sauce, tomato sauce, or cheese sauce. As for side dishes, everything from mashed potatoes to salads will do very well. Add a glass of cold beer for more fun!
If you can’t finish all the balls, put them in an airtight container or resealable bag, which you should line with wax paper to prevent the fat in the sausage balls from staining the container. You can refrigerate this dish for 4 – 7 days without changing its flavor.
That means Bisquick sausage balls are an excellent dish to make ahead of time. In case you want to store it for an even longer period, say, 3- 4 months, don’t hesitate to move the container to the freezer.

Make Your Meals Great Again With Bisquick Sausage Balls!
When it comes to tasty and easy-to-make appetizers for everyone, a line can be drawn very neatly: Bisquick sausage balls and the rest! Master this recipe now, and you will never run out of opportunities to liven your meals or watch your friends beam with delight at the next potluck party.
Anyone interested in giving to the community can contribute great tips for making sausage balls in the comment section. Or you can simply share your experience with them; I’m always all ears! Don’t forget to share this article for more great content!

Bisquick Sausage Balls Recipe
Equipment
- Oven
- Kitchen grater
- Chopping Board
- Large bowl
- Scooper
- Baking tray
Ingredients
For Bisquick Mix
- 2.5 cups flour
- 2 tablespoons baking powder
- 1 tablespoon sugar
- 0.5 teaspoon salt
- 0.5 cup cold butter, cut into pieces
For Sausage Balls
- 3 cups Bisquick mix
- 16 ounces pork sausage
- 16 ounces cheddar cheese
- 0.5 cup whole-fat milk
- 1 teaspoon Italian spices: dried oregano, basil, thyme, etc.
- 2 tablespoons parsley, chopped
Instructions
- If you want to make your own Bisquick mix, combine flour, baking powder, sugar, and salt together. Add the cold butter cubes and rub them with the flour mixture until crumbly.Grate the cheddar cheese.
- Blend cheese with Bisquick mix, sausage meat, milk, and spices vigorously in a large bowl.
- Stop when the dough is firm and moist enough.
- Line the baking tray with baking paper. Preheat the oven to 350°F.Scoop a small portion out of the dough and shape it into a ball of your desired size. Repeat until the dough runs out. Put the sausage balls in the baking tray.
- Bake the sausage balls for about 20 – 25 minutes or until golden brown, then leave them to cool for 10 minutes.Garnish the balls with fresh parsley and oregano. Serve them with your favorite sauce.
Video
Notes
- Omit the ingredient list for making Bisquick mix if you use premade Bisquick mix.
- You can use a hand mixer to work the dough more efficiently.
- The total time is for 45 servings.
Nutrition

Mia Dimitrova
Content Writer
Expertise
Home Cooking, Meal Planning, Food Styling, Food Photography, Culinary Storytelling, Cooking-video Maker, European Food Content Creator, Bulgarian Food Evaluation Expert
Education
Sofia University “St. Kliment Ohridski”
Completed a thesis titled “Bulgaria on a Plate: A Photographic Journey through our Gastronomic Legacy.”
European Culinary Arts Academy
Maria Dimitrova, or Mia, is a Contributing Writer from Sofia, Bulgaria. Her work beautifully intertwines the rich flavors of Bulgarian and European dishes with their visual storytelling, capturing the soul of each cuisine. Through engaging content and stunning photography, Maria explores the intricate relationship between food’s aesthetic appeal and cultural history.
Specializing in home cooking, food styling, and photography, she brings European culinary traditions to life, offering a unique glimpse into Bulgaria’s gastronomic heritage. Maria’s expertise highlights her deep appreciation for culinary art and invites her audience to embark on a flavorful journey through Europe’s diverse food landscape.