
Let me introduce you to chicken kiev, a tasty Ukrainian classic featuring juicy and delicious chicken breast and a unique garlic butter filling. The dish might seem complex at first sight, but I assure you it’s surprisingly straightforward when you break it down.
In this article, I’ll demystify the detailed process of cooking this Ukrainian dish, providing tips and tricks to get that perfect crispy exterior and juicy interior. I will also guide you on selecting the perfect side dishes, and show you how to store your creations for future gastronomic delight.
So, ready to transform your kitchen experiences and delight your taste buds? Your mouth-watering journey into chicken kiev starts here!
Chicken Kiev – A Treasure from Ukrainian Cuisine
Every dish carries the hallmark of its origin, much like how sushi signifies Japan and pasta indicates Italy.
Chicken kiev is no exception – named after Ukraine’s vibrant capital, it stands as a proud symbol of the country’s culinary heritage, tracing its roots back over a century. Different variations of the dish have also found their way into the heart of Russian cuisine.
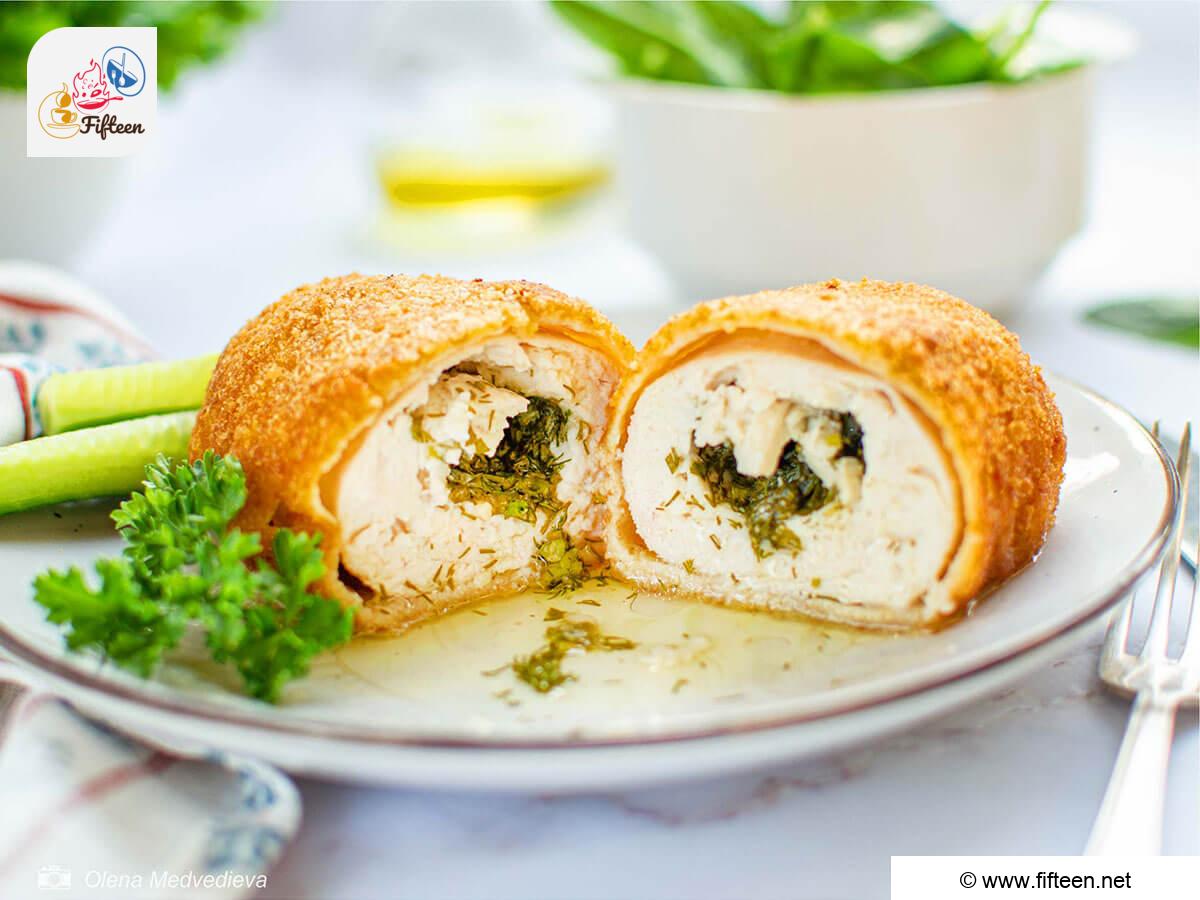
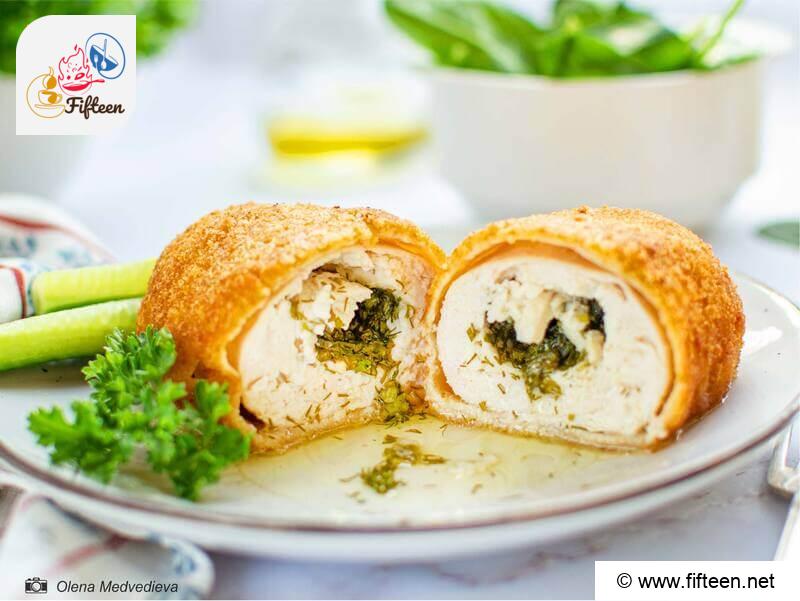
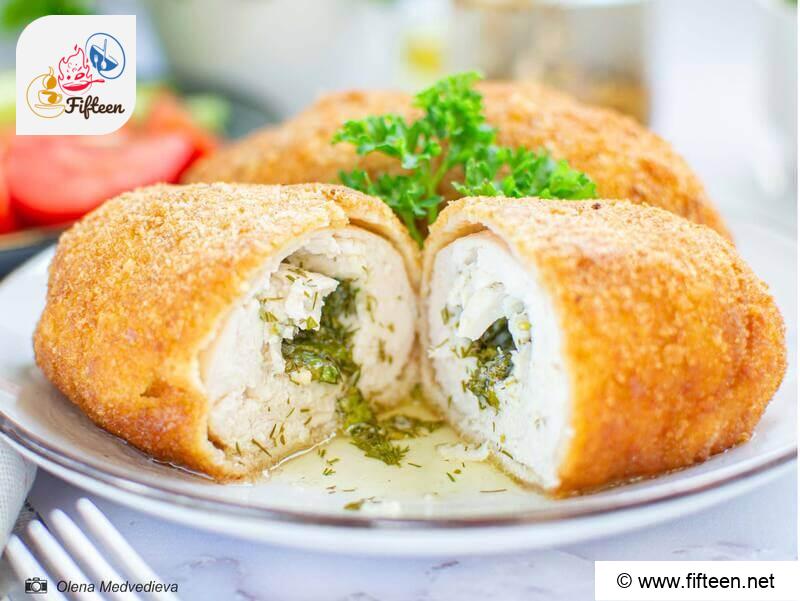
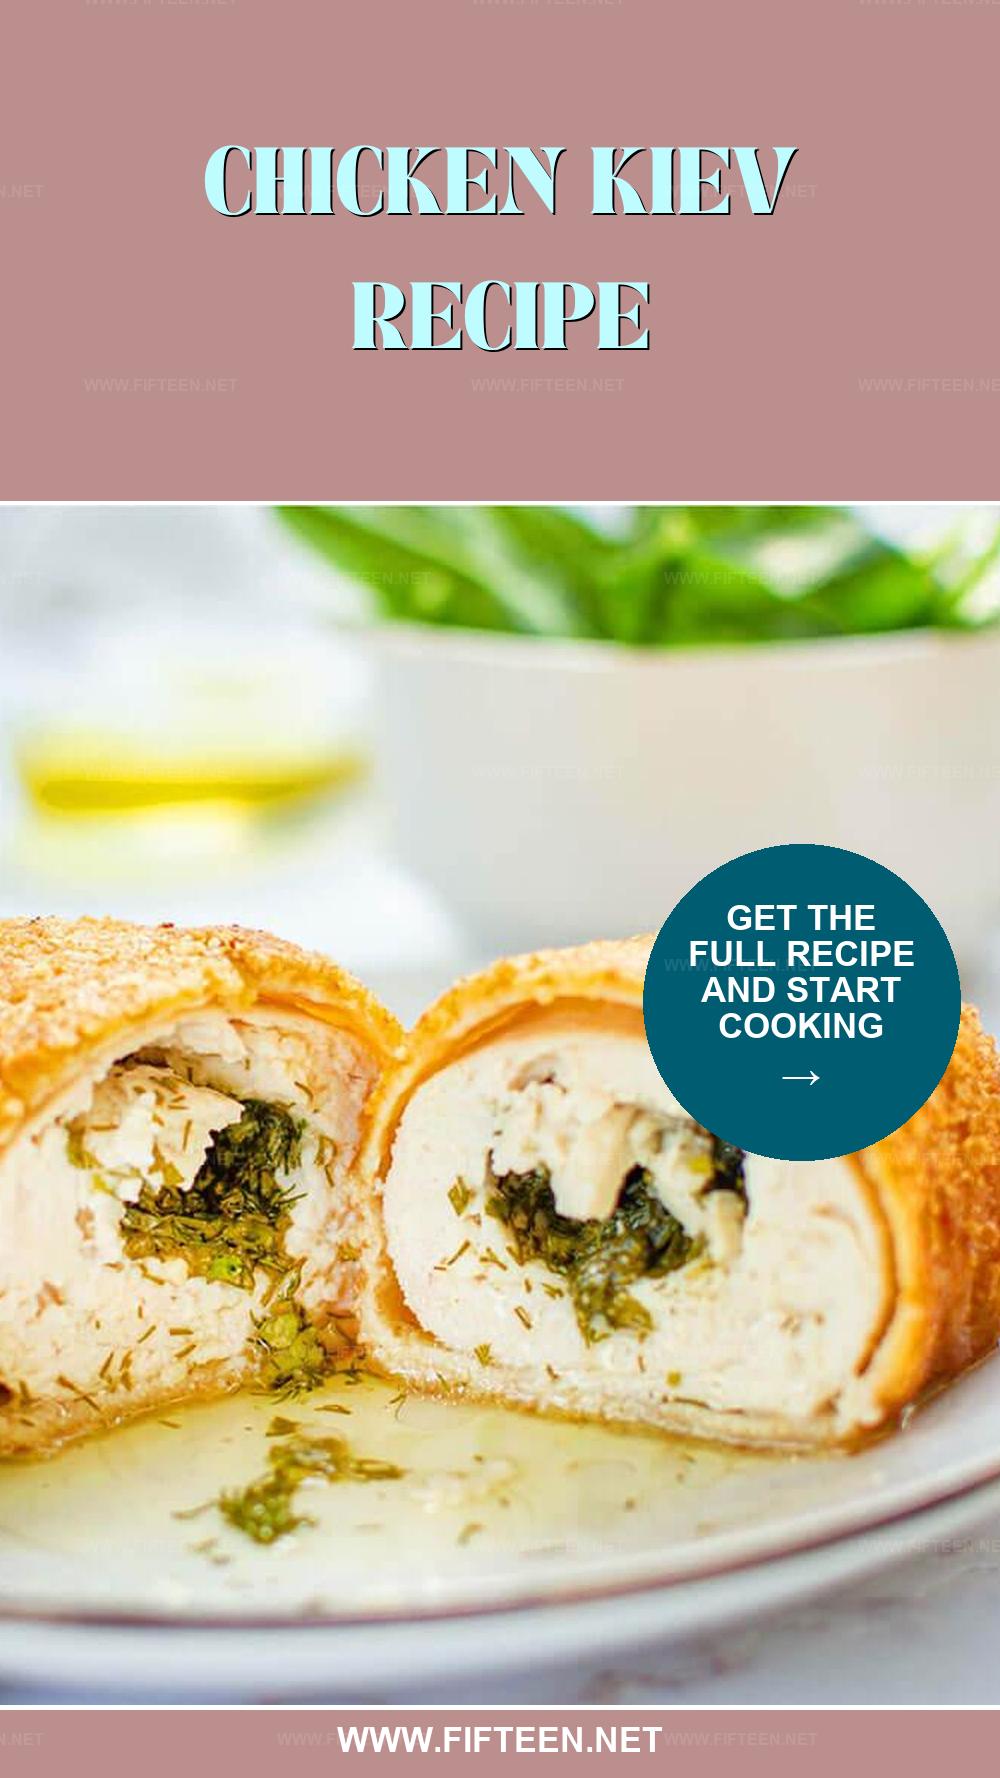
What sets chicken kiev apart? It’s the choice of whole chicken breast, not minced meat. Then there’s the star of the show – the garlic butter filling, a hidden gem that must remain encased throughout the cooking process. It might pose a challenge, but it’s nothing you can’t handle.
Also, due to the presence of butter inside the cutlets, the chicken meat is incredibly juicy. This special cooking method yields what could possibly be the juiciest, most tender chicken breast you’ve ever tasted!
Chicken Kiev: Tools You’ll Need
Here are what tools you need to prepare the perfect chicken kiev:
Main Tools
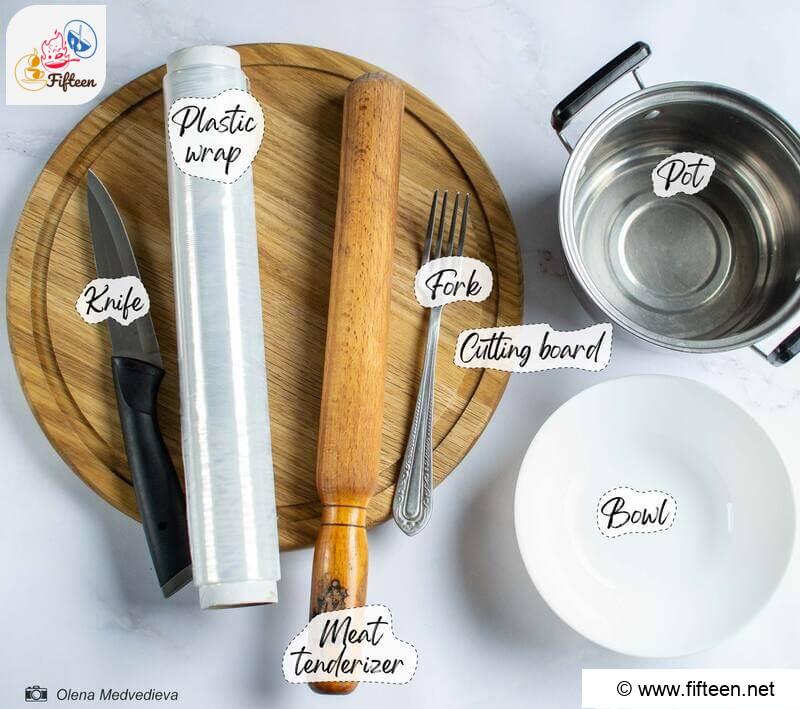
Other Handy Tools
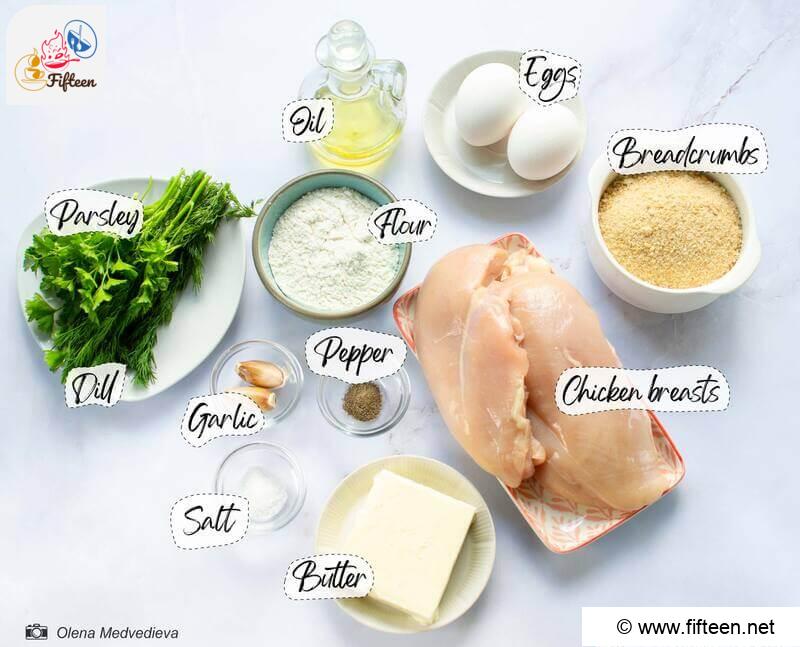
Ingredient Essentials for Chicken Kiev
Below is a full list of ingredients to prepare chicken kiev, including ingredients for the preparation of garlic butter as well as for chicken and breading:
For the Garlic Butter:
For the Chicken and Breading:
Simple Steps to Cook Chicken Kiev
Step 1: Prepare the Filling
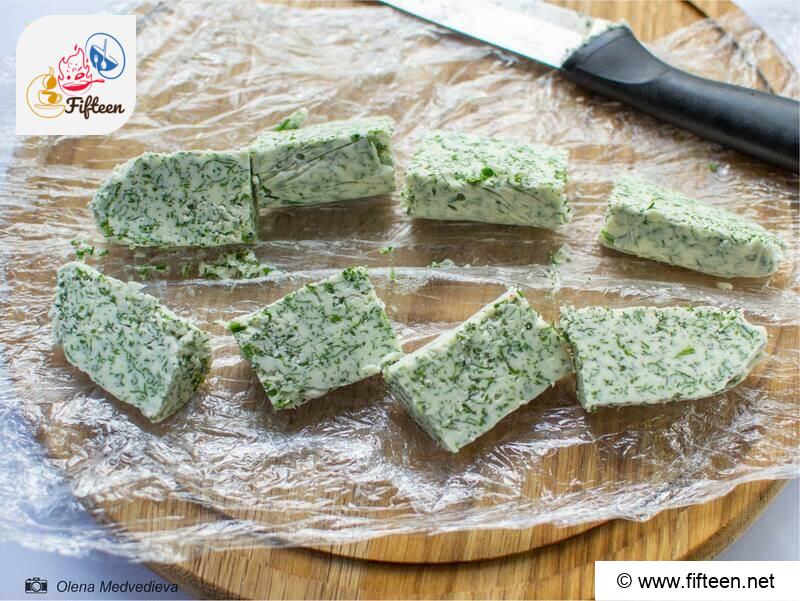
First, let 2.12 ounces butter reach room temperature (no need to melt it). Add these ingredients to the butter:
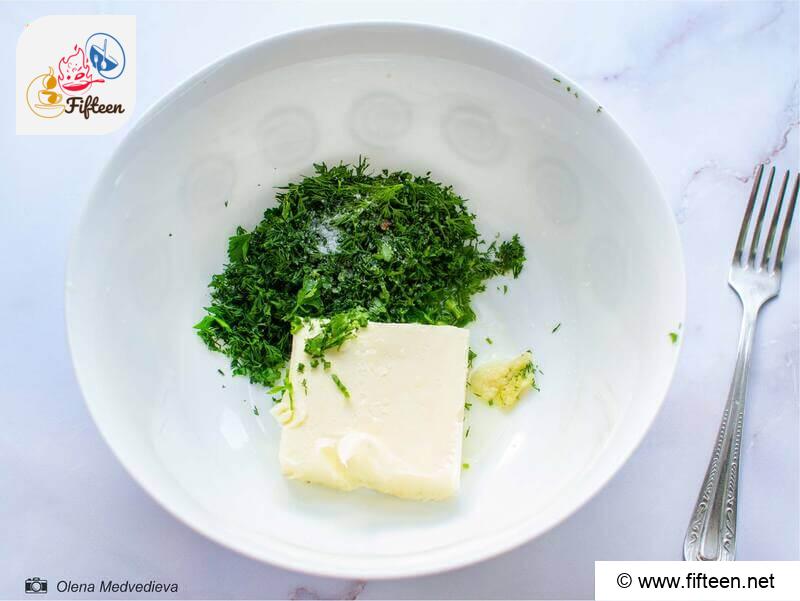
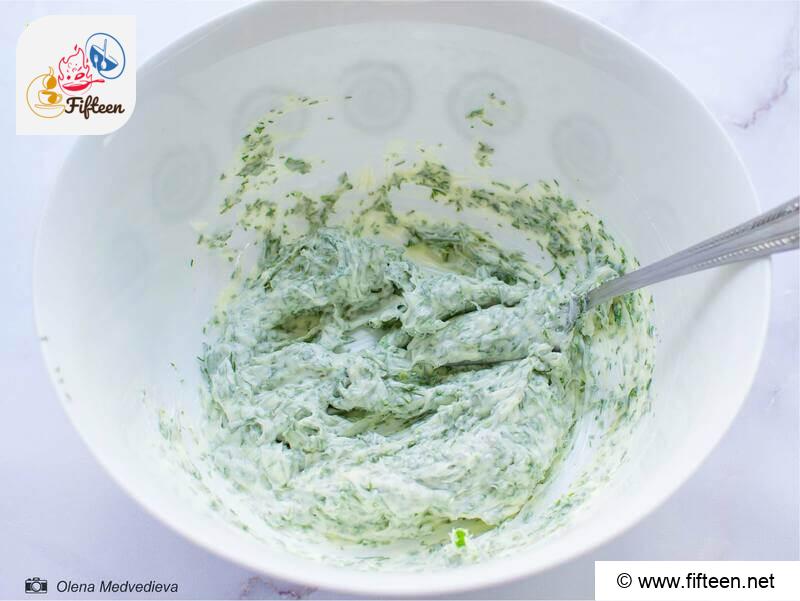
Mix these into your softened butter until you have a smooth blend.
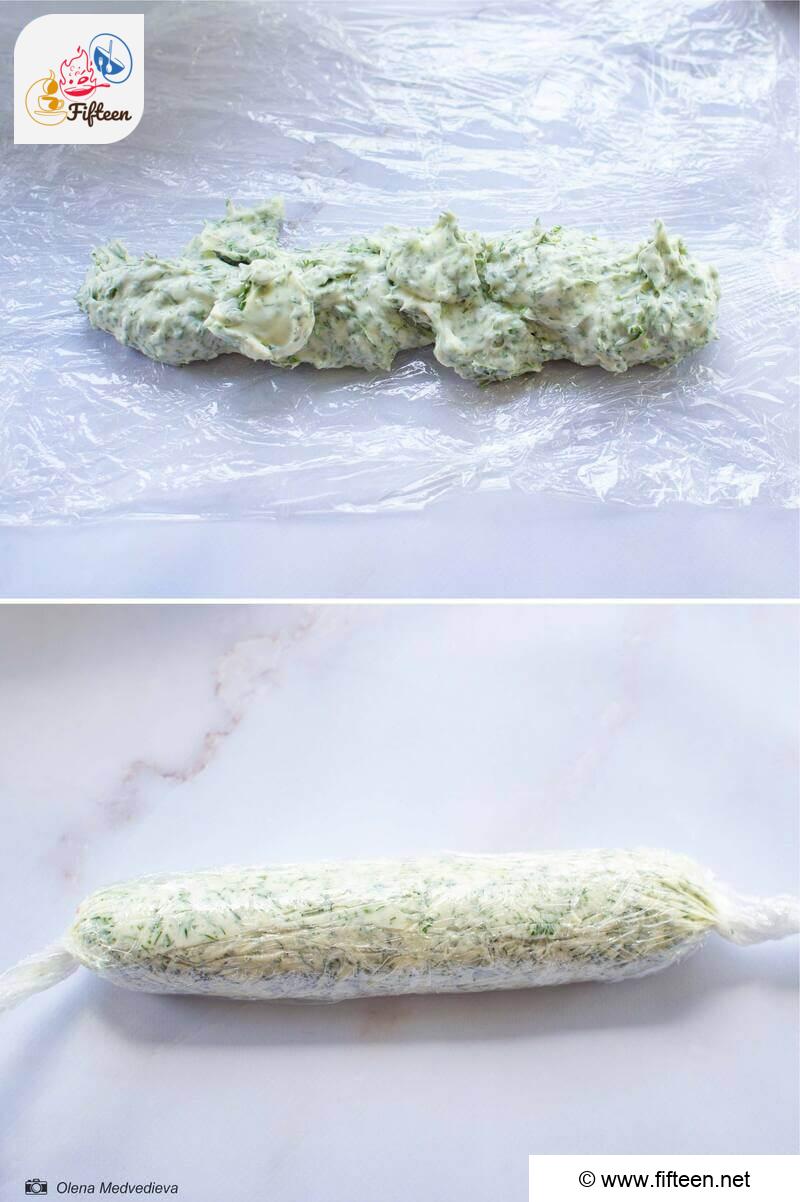
Transfer this mixture onto plastic wrap, shape it into a small log, and let it chill in the freezer while you prepare the chicken filets.
Step 2: Prepare the Chicken
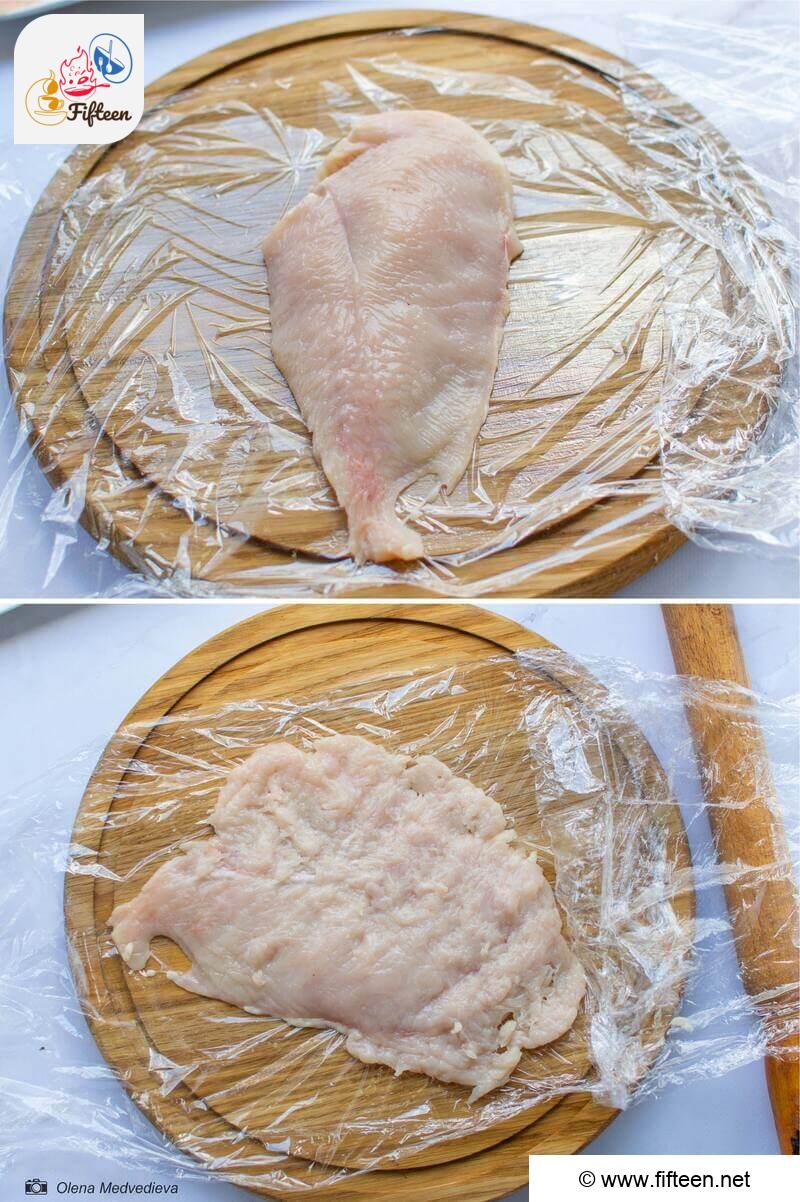
Start by detaching the smaller filet from the larger piece (as shown in the photo).
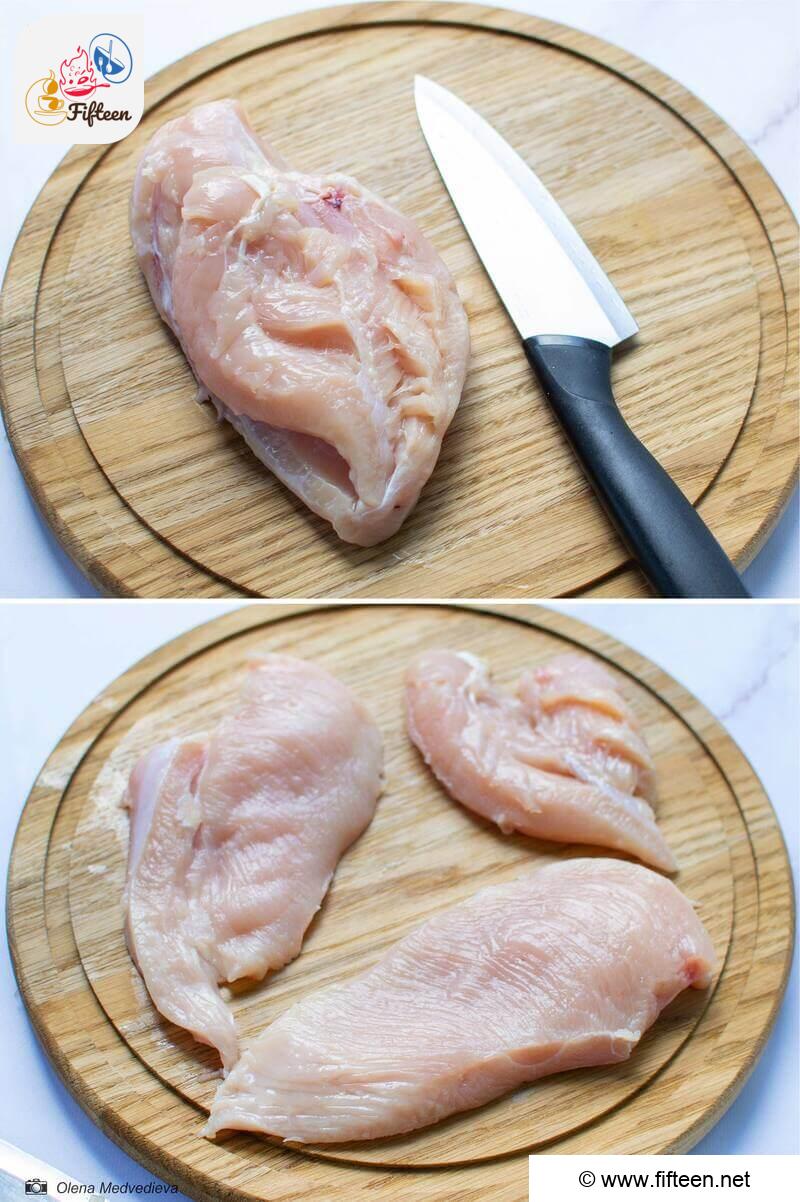
Slice the filet lengthwise to create two flat pieces. Do the same with the smaller filet.
Place the filet between two sheets of plastic wrap and lightly pound it using a meat tenderizer or rolling pin. Be gentle to avoid tearing the tender meat. Aim for a thickness of about 0.2 inches.
Season the chicken with 0.5 teaspoon salt and 0.25 teaspoon pepper. Then remove the hardened filling from the freezer and cut it into 4 pieces.
Wrap each piece of filling first in a small filet, then in a large one like a roll or burrito.
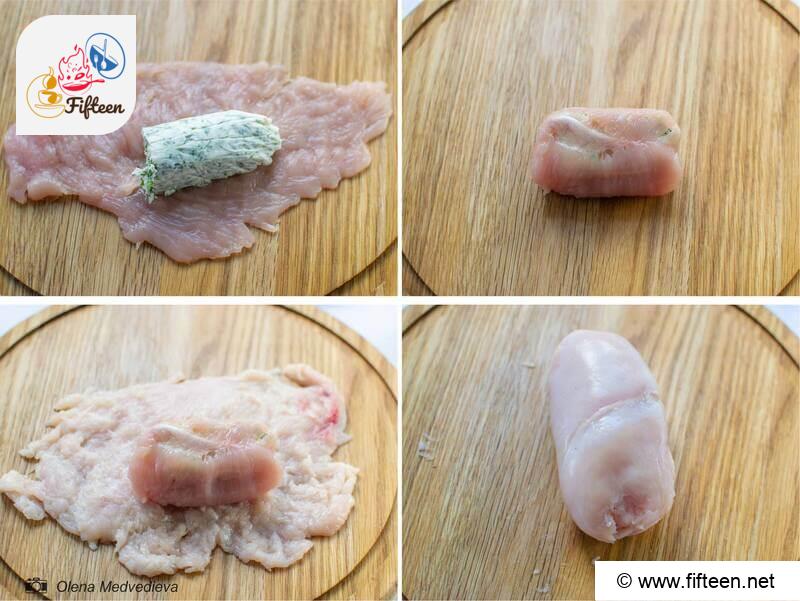
Place these patties on a cutting board and freeze for about 10 minutes – this helps with the breading process and prevents any filling leakage during cooking.
Step 3: Apply the Breading
Place these ingredients in separate bowls:
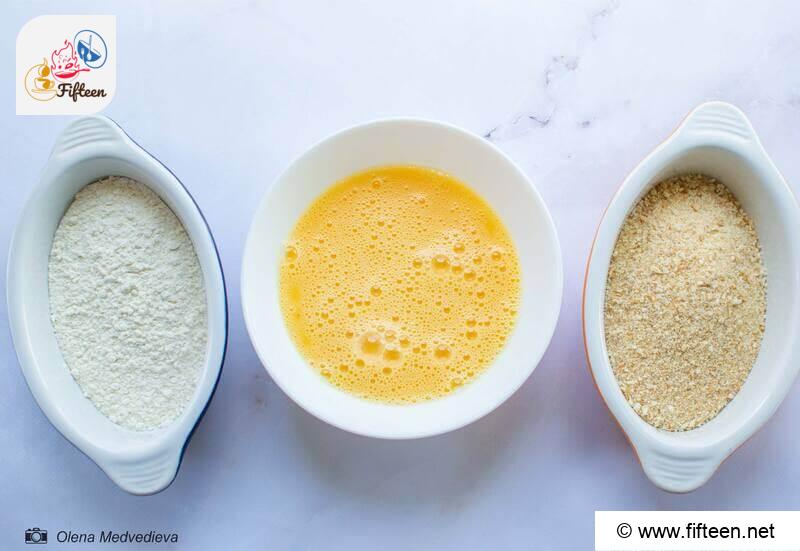
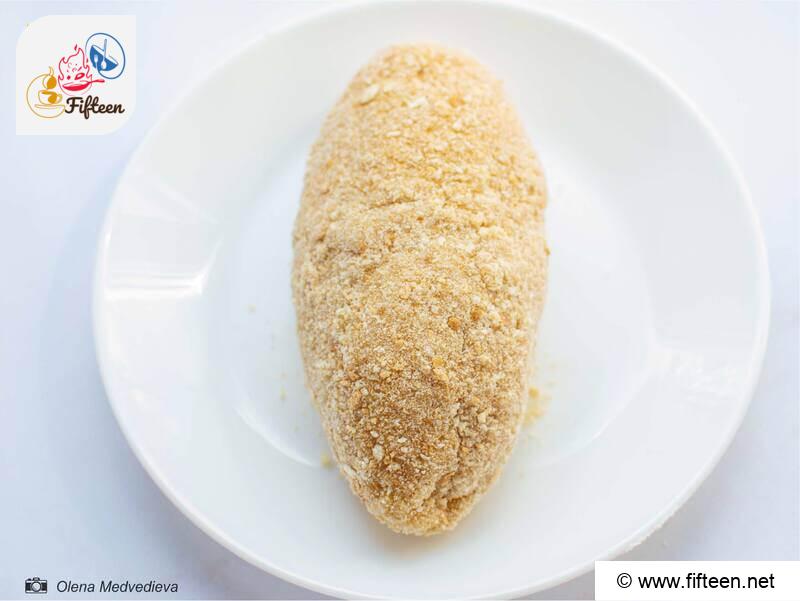
Thoroughly coat each patty in the flour, then the eggs, and finally the breadcrumbs. Repeat for a double layer of breading.
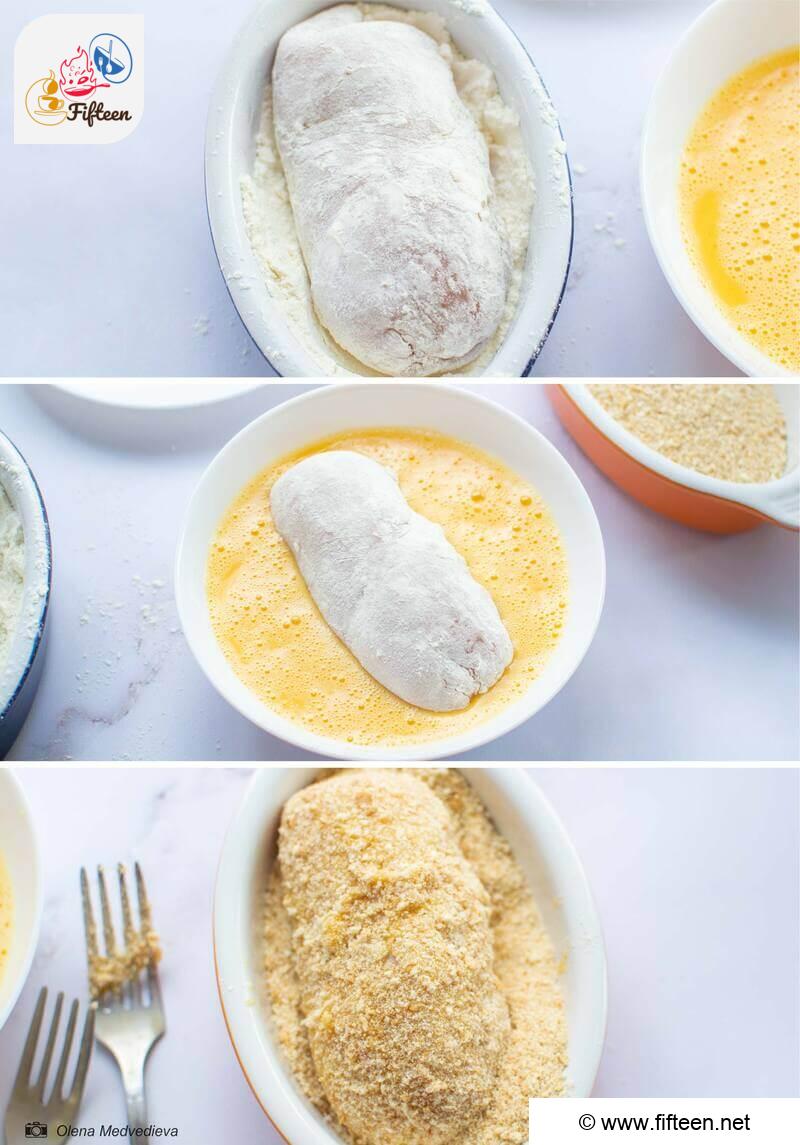
Freeze for 10 minutes to maintain shape and breading integrity.
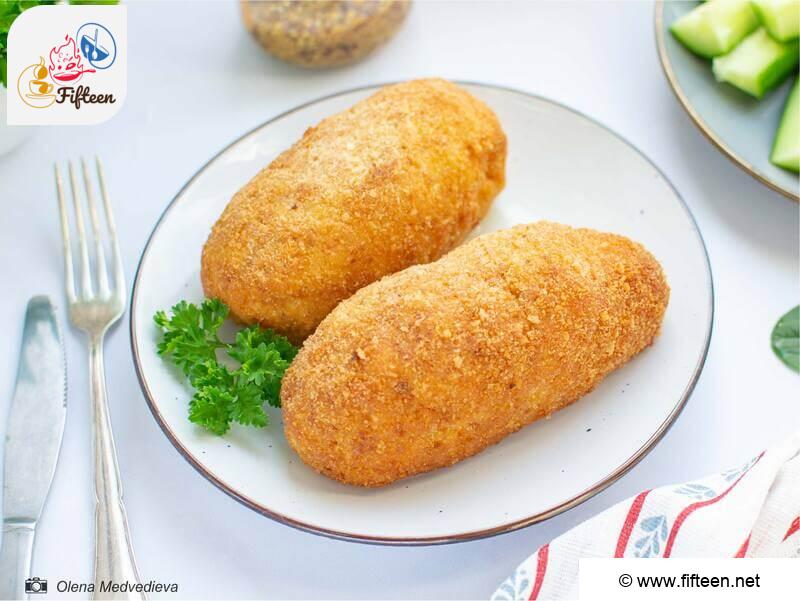
Step 4: Cook to Perfection
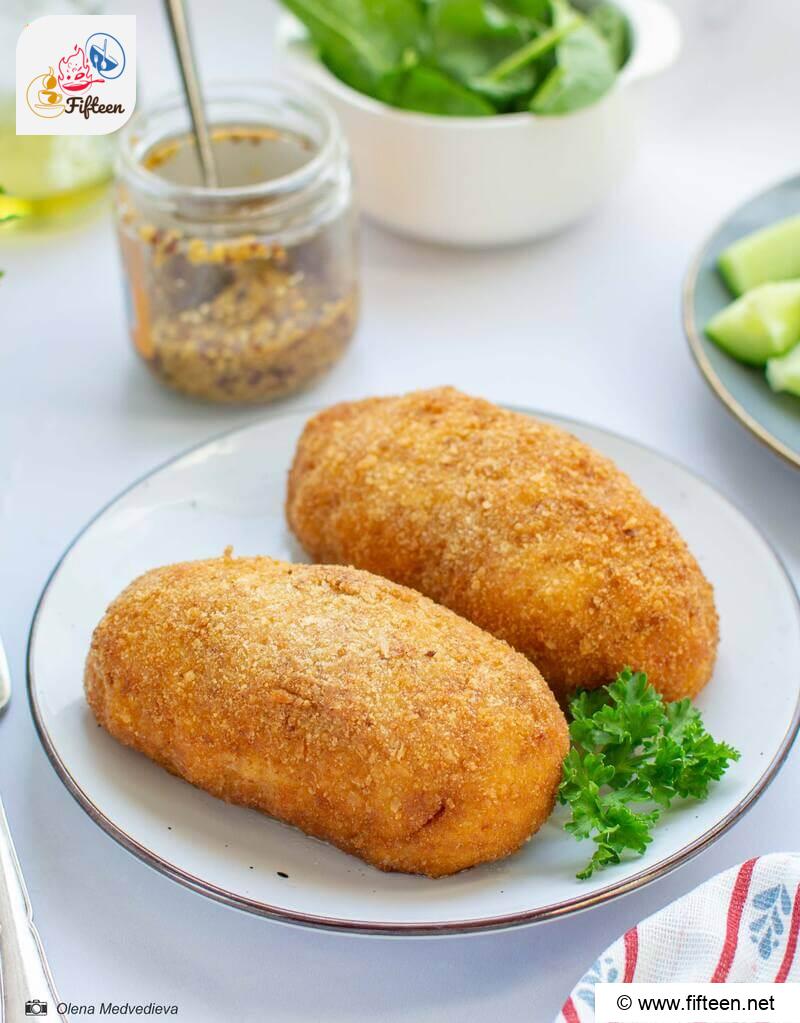
Fry your patties in generous amounts of oil until golden brown, about 1-2 minutes each. You can use a deep fryer.
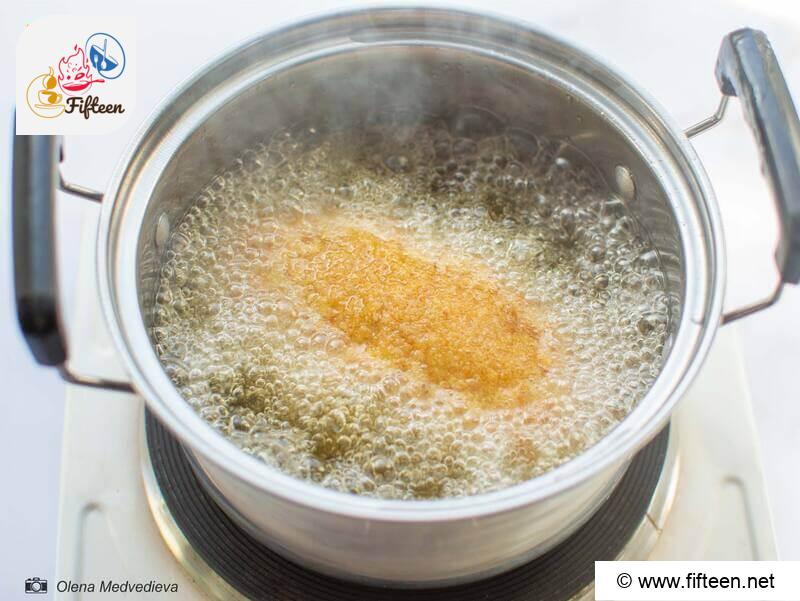
As they sizzle away, preheat your oven to 392 Fahrenheit (200 degrees C).
Transfer your golden-brown patties onto a baking sheet and bake for another 10-15 minutes. Voila, your chicken kiev is ready!
Perfect Chicken Kiev: Tips and Advice
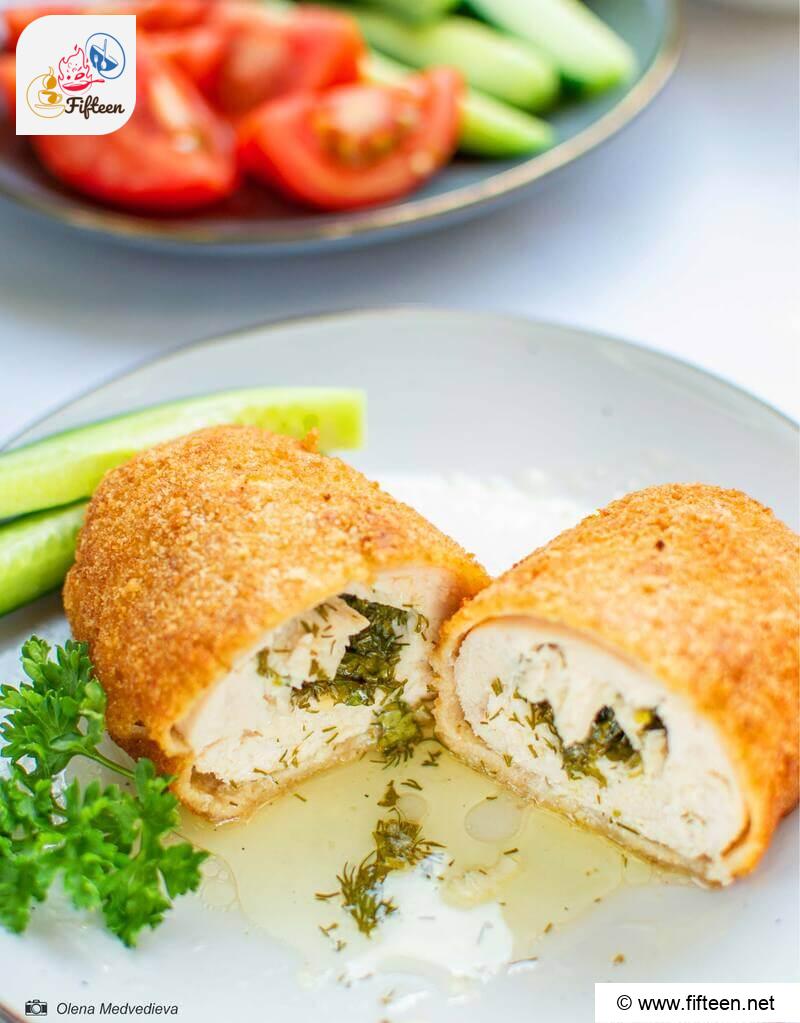
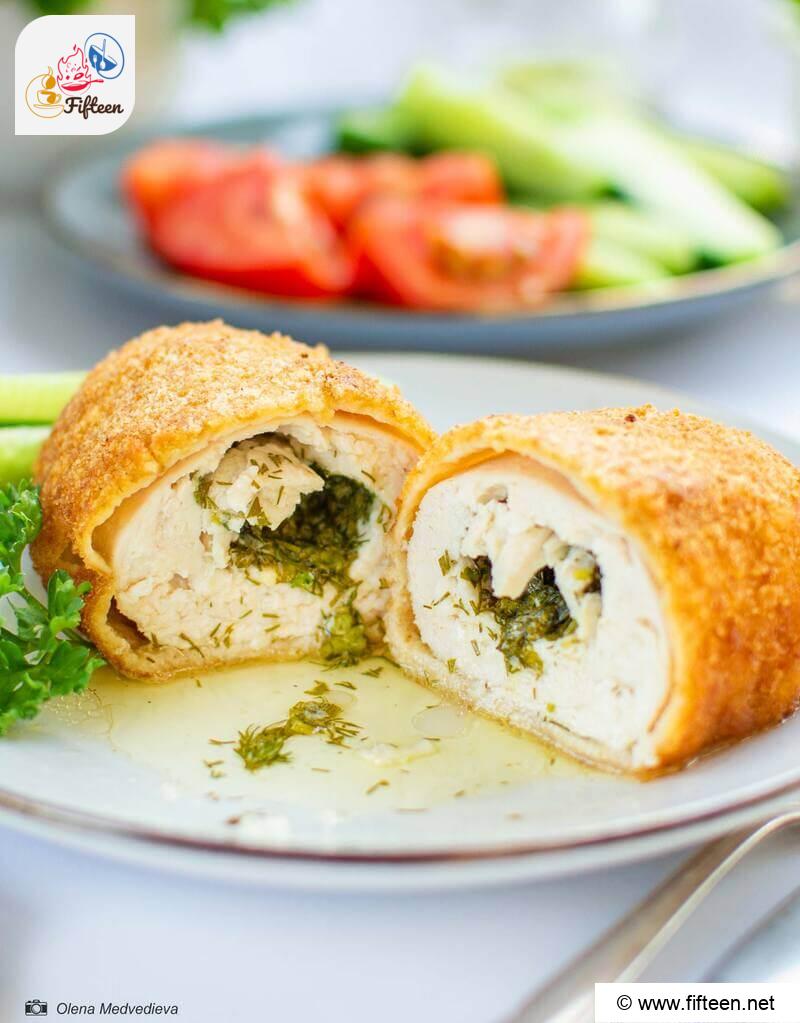
What Side Dishes Go with Chicken Kiev?
Traditionally, chicken kiev doesn’t need a complex side dish. Fresh bread of your choice, along with a selection of fresh vegetables like cucumbers, tomatoes, and greens (parsley, green onions, garlic, dill, celery), works wonderfully.
Seasonal veggies, mashed potatoes, or pasta are also popular choices.
Storage and Make-Ahead Tips for Chicken Kiev
First, it’s important to let your cooked chicken kiev cool down completely before you think about storing it. Once your chicken kiev is cool, place it in an airtight container or tightly wrap it with aluminum foil or plastic wrap.
Finally, place your securely packed chicken kiev into the refrigerator. If you’ve followed the previous steps correctly, the dish should stay fresh and tasty for about 3 to 4 days.
For a make-ahead meal, follow the recipe all the way through to the breading stage. Hold off on cooking. Arrange the breaded, uncooked patties on a baking sheet, ensuring they’re not touching.
Freeze until solid, then transfer your chicken to a freezer-safe container or bag. They’ll keep for up to 3 months in the freezer.
Variations of Chicken Kiev You Will Love
FAQs
Don’t Skip the Delicious Chicken Kiev
I urge you to try this recipe at home. It’s a dish that will wow both adults and kids alike with its tender, flavorful meat. It’s not just a simple patty but a gourmet treat you can cook at home. So why not surprise your family and guests at your next gathering?
If you’ve enjoyed this recipe and found it helpful, I’d love it if you could hit the ‘Like’ button and share this post with your friends and family. They might just find their new favorite meal! Furthermore, don’t forget to drop a comment below telling me how your chicken kiev turned out!
Ukrainian Chicken Kiev Recipe
Equipment
- Knife
- Cutting Board
- Meat Tenderizer
- Plastic Wrap
- Whisk (or Fork)
Ingredients
For the Garlic Butter
- 2.12 ounces butter
- 2 teaspoons parsley and dill finely chopped
- 1 small garlic clove very finely minced
- 0.25 teaspoon salt
- 1 teaspoon fresh lemon juice
For the Chicken and Breading
- 2 chicken breasts
- 0.5 teaspoon salt
- 0.25 teaspoon pepper
- 1 egg lightly whisked
- 0.25 cup flour
- 1 cup white breadcrumbs
- Oil for frying
Instructions
- First, let your butter reach room temperature (no need to melt it).
- Grind your fresh parsley, dill, and garlic, then add salt, pepper, and a dash of lemon juice. Mix these into your softened butter until you have a smooth blend.
- Transfer this mixture onto plastic wrap, shape it into a small log, and let it chill in the freezer while you prepare the chicken filets.

- Detaching the smaller filet from the larger piece (as shown in the photo).

- Slice the filet lengthwise to create two flat pieces. Do the same with the smaller filet. Place the filet between two sheets of plastic wrap and lightly pound it using a meat tenderizer or rolling pin. Be gentle to avoid tearing the tender meat. Aim for a thickness of about 0.2 inches. Season the chicken with salt and pepper.

- Then remove the hardened filling from the freezer and cut it into 4 pieces.
- Wrap each piece of filling first in a small filet, then in a large one like a roll or burrito.Place these patties on a cutting board and freeze for about 10 minutes – this helps with the breading process and prevents any filling leakage during cooking.
- Prepare enough flour, breadcrumbs, and eggs. Pour the flour and breadcrumbs into separate bowls, and beat the eggs a little.
- Thoroughly coat each patty in the flour, then the eggs, and finally the breadcrumbs. Repeat for a double layer of breading

- Freeze for 10 minutes to maintain shape and breading integrity.
- Fry your patties in generous amounts of oil until golden brown, about 1-2 minutes each. You can use a deep fryer.As they sizzle away, preheat your oven to 392 Fahrenheit (200 degrees C).Transfer your golden-brown patties onto a baking sheet and bake for another 10-15 minutes.
- Voila, your chicken kiev is ready!
Video
Notes
- The total time is based on 2 servings of chicken kiev.
- Be sure to finish cooking in the oven. The cutlets are rather large and thick, and frying alone may not cook them through. The exterior could burn before the inside is fully cooked.
- Although the classic recipe recommends sunflower oil, feel free to use any other variety, such as olive oil.
- Aim for uniformity in your chicken filets, ideally from young chickens, to ensure even cooking.
- Don’t shy away from experimenting with spices. You can omit the pepper entirely, or add some heat with chili peppers or jalapenos for a spicier version.
- To tenderize the meat further, consider marinating it in highly carbonated mineral water for 30 minutes to an hour.
- When tenderizing the meat, using plastic wrap is crucial to prevent the filet from tearing.
- For an extra crispy, thick crust, you can bread the meat three times. Follow this sequence: flour – egg – breadcrumbs – egg – breadcrumbs – egg – breadcrumbs.
Nutrition
Olena Medvedieva
Content Writer
Expertise
Content Writer, Meal Planning, Recipe Development, Food Editor, Cooking-video Maker, Culinary Storytelling, Food Photographer, Food Stylist, Chef
Education
Taras Shevchenko National University of Kyiv, Ukraine
Introducing Olena, a culinary enthusiast from Ukraine, whose journey from philology studies to the world of food photography and styling is nothing short of inspiring. With a deep-seated love for both cooking and capturing stunning visuals, Olena’s work reflects her passion for culinary arts and her commitment to showcasing the beauty of Ukrainian cuisine. Her expertise extends beyond the kitchen, as she combines her creative talents to produce captivating images that grace numerous online platforms and publications.